
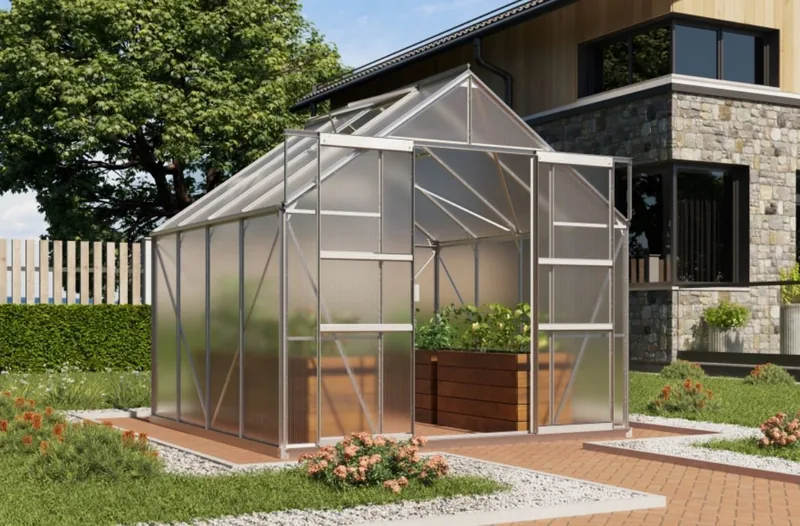

Vitavia Mars 6700 Bedienungsanleitung
PDF-Handbuch · 32 Seiten
Deutsch



Schnelle Überprüfung
Falsche Antwort, bitte versuchen Sie es erneut.
Chatten Sie mit Ihrem Vitavia Mars 6700-Handbuch mithilfe von KI
Erhalten Sie sofortige KI-Antworten aus Ihrem Vitavia Mars 6700-Handbuch
Fragen Sie alles über Vitavia Mars 6700. Antworten stammen aus diesem Handbuch, mit den Seiten, auf denen sie basieren.
Mars 6700 Wartungsplan
Gründlich mit einem milden Reinigungsmittel waschen. Stellen Sie sicher, dass das Reinigungsmittel nicht aggressiv mit Aluminium- oder Glasbefestigungsklammern reagiert.
Obere und untere Türschienen regelmäßig reinigen, um Ablagerungen zu vermeiden.
Stellen Sie eine Frage
Empfehlen Sie Mars 6700?
Ja NeinHäufig gestellte Fragen
Es kombiniert einen Aluminiumrahmen, 4-mm-Verglasung, eine Dachlüftung und eine Schiebetür und schafft so einen praktischen Raum für den Pflanzenanbau bei relativ einfacher Pflege.
Ist diese Antwort hilfreich?
Ja. Ein quadratisches und ebenes Fundament ist wichtig für die Stabilität. Die Anleitung betont, dass das Gewächshaus besonders in windigen Lagen korrekt verankert werden sollte.
Ist diese Antwort hilfreich?
Es wird dringend empfohlen, dass zwei Personen den Aufbau übernehmen. Die Teile sind groß genug, und das Einsetzen der Verglasung ist mit Hilfe einfacher und sicherer.
Ist diese Antwort hilfreich?
Gelegentliches Waschen mit einem milden Reinigungsmittel, regelmäßiges Reinigen der Türschienen und das Überprüfen von Dichtungen und Clips sind die wichtigsten Wartungsarbeiten.
Ist diese Antwort hilfreich?
Ja, wenn es korrekt verankert und auf einem geeigneten Untergrund installiert wird. In sehr exponierten Bereichen wird eine zusätzliche Befestigung auf einem Stahlfundament empfohlen.
Ist diese Antwort hilfreich?
Schließen Sie bei starkem Wind alle Türen und Lüftungsöffnungen. Bei starkem Schneefall sollte das Dach von Schnee befreit werden, damit die Last für die Konstruktion nicht zu groß wird.
Ist diese Antwort hilfreich?
Vorteile und Nachteile
Vorteile

- Leichter Aluminiumrahmen bietet solide Haltbarkeit bei geringem Wartungsaufwand.
- 4-mm-Verglasung sorgt für gute Lichtverhältnisse für gesundes Pflanzenwachstum.
- Dachlüftung und Schiebetür verbessern die Belüftung und den täglichen Zugang.
- Das detaillierte Montagesystem hilft, bei korrektem Aufbau ein stabiles, rechtwinkliges Gewächshaus zu schaffen.
Nachteile

- Der Aufbau ist zeitaufwendig und erfordert sorgfältiges schrittweises Arbeiten.
- Für die Montage werden zwei Personen empfohlen, was die Flexibilität einschränken kann.
- Ein ebenes, quadratisches Fundament ist unerlässlich, daher ist die Standortvorbereitung wichtig.
- Die Handhabung der Verglasung und das Anziehen der Befestigungen erfordern Vorsicht, um Schäden zu vermeiden.
Produkt Spezifikation
Verglasung
Polycarbonat 4mm (Doppelstegplatten)
Rahmen
Aluminium
Farbe
silber
Fläche
6,7m²
Besondere Merkmale
2 Dachfenster
Tür
Doppelschiebetür, Regenrinne
Abmessungen (LxBxH)
2580 x 2570 x 2320 mm
Gewicht
54,80 kg
Produkt Beschreibung
Vitavia Mars 6700 HKP 4mm Gewächshaus aus Aluminium
Das Vitavia Mars 6700 HKP 4mm Gewächshaus aus Aluminium ist eine praktische Wahl für Gärtner, die einen zuverlässigen Anbauraum mit einer klaren, leichten Konstruktion suchen. Es basiert auf einem Aluminiumrahmen und ist für 4 mm Verglasung ausgelegt. So verbindet es Langlebigkeit mit einem eleganten Erscheinungsbild, das sowohl in kompakte als auch in größere Gartenumgebungen passt.
Einer der größten Vorteile dieses Gewächshauses ist seine durchdachte Konstruktion. Der Rahmen ist dafür vorgesehen, auf einem ebenen Fundament verankert zu werden, was dazu beiträgt, dass die Struktur bei wechselndem Wetter stabil bleibt. Zum Design gehören außerdem eine Schiebetür und eine Dachlüftung, die Ihnen eine bessere Luftzirkulation ermöglichen und den täglichen Zugang erleichtern. Für Pflanzenliebhaber bedeutet das ein angenehmeres Umfeld für Setzlinge, Kräuter, Tomaten und saisonale Kulturen.
Die Anleitung betont die Bedeutung eines sorgfältigen Aufbaus, und das sagt viel über das Produkt selbst aus: Dieses Gewächshaus ist für den langfristigen Einsatz gebaut, nicht für eine schnelle provisorische Lösung. Die Aluminiumprofile, Verglasungsleisten, Streben und Türkomponenten arbeiten zusammen, um bei korrektem Aufbau ein stabiles Gewächshaus zu schaffen. Die 4-mm-Verglasung macht es zu einer vielseitigen Option für Gärtner, die Schutz, Lichtdurchlässigkeit und eine saubere Optik wünschen.
Es ist auch ein Gewächshaus, das gute Vorbereitung belohnt. Ein quadratischer Unterbau, die richtigen Werkzeuge und zwei Personen für den Aufbau werden empfohlen, was die Installation erleichtert und das Endergebnis zuverlässiger macht. Nach der Montage ist die Pflege einfach: gelegentliches Waschen, saubere Türschienen und die Kontrolle von Dichtungen und Clips helfen dabei, die Leistung Saison für Saison zu erhalten.
Hinweise
- Am besten an einem sonnigen, windgeschützten Standort aufstellen.
- Muss verankert und waagerecht gehalten werden.
- Türen und Lüftungsöffnungen bei starkem Wind schließen.
- Schnee im Winter vom Dach entfernen.
- Modellaufkleber und Anleitung für spätere Referenz aufbewahren.
Suche nach 67.706 Bedienungsanleitungen online


Marke oder Modell eingeben