Manual.ly Logo

NZXT Kraken X Series Bedienungsanleitung

0,0 · 0 Bewertungen

PDF-Handbuch · 2 Seiten

Deutsch

M: OA-GPT-5-NAN
Seite

/ 2

Loading...
e83600373d447ca00e84e2421fa14deecb6d page 1
COMPONENT LIST
LISTA DE COMPONENTES
LISTE DES COMPOSANTS
KOMPONENTENLISTE
ELENCO DEI COMPONENTI
LISTA DE COMPONENTES
 
구성품 목록
部 品リスト
零件表
零件表
SOCKET 115X
* FOR SOCKETTR4, PLEASE SKIP TO AMD - STEP 3
CORRECT
INCORRECT
SOCKET 1366
KRAKEN X SERIES
240MM / 280MM / 360MM LIQUID COOLER WITH RGB
A Kraken X53 / X63 / X73
x1
D Intel Backplate
x1
L Aer P Fan
X53 - x2 120MM
X63 - x2 140MM
X73 - x3 120MM
J 5mm UNC 6-32 Screw
X53 - x8
X63 - x8
X73 - x12
H Thumbscrew
x4
E Intel Socket 115X/1366 Standoff
x4
M Breakout Cable Set
x1
F Intel Socket 2011/2066 Standoff
x4
N Micro-USB Cable
x1
C AMD Retention Bracket
x1
B Intel Retention Bracket (pre-installed)
x1
K Washer
X53 - x16
X63 - x16
X73 - x24
I 30mm UNC 6-32 Fan Screw
X53 - x16
X63 - x16
X73 - x12
G AMD Standoff (AM4)
x4
STEP 1
STEP 2
STEP 3
STEP 1
STEP 1
STEP 2
A .
Kraken X53 / X63 / X73
B .
Soporte de sujeción Intel (preinstalado)
C .
Soporte de sujeción AMD
D .
Placa trasera Intel
E .
Separador del zócalo Intel 115X/1366
F .
Separador del zócalo Intel 2011/2066
G .
Separador para AMD (AM4)
H .
Tornillo de mariposa
I .
Tornillo de ventilador UNC 6-32 de 30 mm
J .
Tornillo UNC 6-32 de 5 mm
K .
Arandela
L .
Ventilador Aer P
M .
Juego de cables de conexión
N .
Cable Micro-USB
A .
Kraken X53 / X63 / X73
B .
   Intel ( )
C .
   AMD
D .
  Intel
E .
   Intel Socket 115X/1366
F .
   Intel Socket 2011/2066
G .
    AMD (AM4)
H .
   
I .
 , 30 , UNC 6-32
J .
, 5 , UNC 6-32
K .

L .
 Aer P
M .
 
N .
 micro-USB
A .
Kraken X53 / X63 / X73
B .
Support de rétention Intel (préinstallé)
C .
Support de rétention AMD
D .
Backplate Intel
E .
Entretoise Intel Socket 115X/1366
F .
Entretoise Intel Socket 2011/2066
G .
Entretoise AMD (AM4)
H .
Vis à main
I .
Vis pour ventilateur 30mm UNC 6-32
J .
Vis 5mm UNC 6-32
K .
Rondelle
L .
Ventilateur Aer P
M .
Câble multi-broches
N .
Câble micro-USB
A .
Kraken X53 / X63 / X73
B .
Intel 리텐션 브라켓(사전 설치)
C .
AMD 리텐션 브라켓
D .
Intel 백플레이트
E .
Intel Socket 115X/1366 스탠드오프
F .
Intel Socket 2011/2066 스탠드오프
G .
AMD 스탠드오프 (AM4)
H .
나비나사
I .
30mm UNC 6-32 팬 나사
J .
5mm UNC 6-32 나사
K .
와셔
L .
Aer P 팬
M .
브레이크아웃 케이블 세트
N .
마이크로 USB 케이블
A .
Kraken X53 / X63 / X73
B .
Intel-Halterung (vormontiert)
C .
AMD-Halterung
D .
Intel-Rückplatte
E .
Intel-Sockel 115X/1366 Abstandshalter
F .
Intel-Sockel 2011/2066 Abstandshalter
G .
AMD-Abstandhalter (AM4)
H .
Rändelschraube
I .
30 mm UNC 6-32 Lüfterschraube
J .
5 mm UNC 6-32 Schraube
K .
Unterlegscheibe
L .
Aer P Lüfter
M .
Breakoutkabelsatz
N .
Micro-USB-Kabel
A .
Kraken X53 / X63 / X73
B .
Intelリテンションブラケット(プリインストール済み)
C .
AMDリテンションブラケット
D .
Intelバックプ レ ート
E .
Intelソ ケ ット 115X/1366スタンドオフ
F .
Intelソ ケ ット 2011/2066スタンドオフ
G .
AMDスタンドオフ (AM4)
H .
つまみネジ
I .
30mm UNC 6-32ファン 用ネ ジ
J .
5mm UNC 6-32ネジ
K .
ワッシャー
L .
Aer Pファン
M .
ブレークアウトケーブルセット
N .
マイクロ USBケーブル
A .
Kraken X53 / X63 / X73
B .
Supporto di fissaggio Intel (preinstallato)
C .
Supporto di fissaggio AMD
D .
Piastra posteriore Intel
E .
Perno di fissaggio socket Intel 115X/1366
F .
Perno di fissaggio socket Intel 2011/2066
G .
Perno di fissaggio AMD (AM4)
H .
Vite a testa zigrinata
I .
Vite per ventola UNC 6-32, 30 mm
J .
Vite UNC 6-32, 5 mm
K .
Rondella
L .
Ventola Aer P
M .
Set cavi breakout
N .
Cavo Micro-USB
A .
Kraken X53 / X63 / X73
B .
Intel 固定支架(预装)
C .
AMD 固定支架
D .
Intel 背板
E .
Intel Socket 115X/1366 螺丝柱
F .
Intel Socket 2011/2066 螺丝柱
G .
AMD 支架 (AM4)
H .
手动螺丝
I .
30 mm UNC 6-32 风扇螺丝
J .
5 mm UNC 6-32 螺丝
K .
垫圈
L .
Aer P 风扇
M .
分支电缆组件
N .
Micro-USB 连接线
A .
Kraken X53 / X63 / X73
B .
Suporte de retenção Intel (pré-instalado)
C .
Suporte de retenção AMD
D .
Backplate Intel
E .
Espaçador para soquete Intel 115X/1366
F .
Espaçador para soquete Intel 2011/2066
G .
Espaçador AMD (AM4)
H .
Parafuso-borboleta
I .
Parafuso do fan de 30 mm UNC 6-32
J .
Parafuso de 5 mm UNC 6-32
K .
Arruela
L .
Fan Aer P
M .
Jogo de cabos do tipo breakout
N .
Cabo microUSB
A .
Kraken X53 / X63 / X73
B .
Intel 固定支架 (預先安裝)
C .
AMD 固定支架
D .
Intel 背板
E .
Intel 插座 115X/1366 固定座
F .
Intel 插座 2011/2066 固定座
G .
AMD 銅柱 (AM4)
H .
翼形螺釘
I .
30mm UNC 6-32 風扇螺絲
J .
5mm UNC 6-32 螺絲
K .
墊圈
L .
Aer P 風扇
M .
分支連接線組
N .
Micro-USB 連接線
PREPARATION - INTEL LGA 115X / 1366
PREPARATION - AMD PREPARATION - INTEL LGA 2011/2066
D D
D
E
F
G
STEP 3
1. Press and hold the Intel retention bracket firmly towards the pump.
2. Rotate the Intel retention bracket counterclockwise to release.
3. Pull out the Intel retention bracket.
4. Follow these steps in reverse order to install the AMD retention bracket onto the pump. For SocketTR4, Install the
AMD SocketTR4 retention bracket included inside the Threadripper CPU retail box.
1. Pressione e gire o suporte de retenção Intel firmemente em direção à bomba.
2. Gire o suporte de retenção Intel no sentido anti-horário para liberar.
3. Puxe o suporte de retenção Intel para fora.
4. Siga estas etapas na ordem inversa para instalar o suporte de retenção AMD na bomba. Para o SocketTR4, instale o
suporte de retenção do AMD SocketTR4 incluído dentro da caixa de varejo da CPU Threadripper.
1. Tenere premuto saldamente il supporto di fissaggio Intel verso la pompa.
2. Ruotare in senso antiorario il supporto di fissaggio Intel per sbloccarlo.
3. Estrarre il supporto di fissaggio Intel.
4. Seguire questa procedura in ordine inverso per installare il supporto di fissaggio AMD sulla pompa. Per il Socket TR4,
installare il supporto di fissaggio del Socket AMD TR4 incluso all'interno del vano per la CPU Threadripper.
1. Mantén presionado firmemente el soporte de sujeción Intel hacia la bomba.
2. Gira el soporte de sujeción Intel en sentido contrario a las agujas del reloj para soltarlo.
3. Saca el soporte de sujeción Intel.
4. Sigue estos pasos a la inversa para instalar el soporte de sujeción AMD en la bomba. Para el zócalo TR4, instala el
soporte de sujeción TR4 AMD que viene en el interior de la caja de la CPU Threadripper.
1.      Intel        .
2.     Intel   ,     .
3.     Intel.
4.      ,      AMD  . 
  Socket TR4     AMD Socket TR4,    
  Threadripper.
1. 适当用力,将预装好的 Intel 固定支架向冷头方向按下。
2. 逆时针旋转 Intel 固定支架,直到其松开。
3. 取出 Intel 固定支架。
4. 请按相反顺序执行以上步骤,将 AMD 固定支架安装到冷头上。对于 Socket TR4 平台,请使用 Threadripper CPU 零售包装盒
内的 AMD Socket TR4 固定支架进行安装。
1. 朝向泵浦用力按壓 Intel 固定支架。
2. 逆時針旋轉 Intel 固定支架將其釋放。
3. 拉出 Intel 固定支架。
4. 按照相反順序執行這些步驟,將 AMD 固定支架安裝到泵浦上。對於 SocketTR4,請安裝 Threadripper CPU 零售包裝盒內隨附
的 AMD SocketTR4 固定支架。
1. Appuyez sur le support de rétention Intel et poussez le vers la pompe.
2. Tournez le support dans le sens inverse des aiguilles d’une montre pour le libérer.
3. Retirez le support de rétention Intel.
4. Renouvelez la manipulation dans l’ordre inverse des étapes ci-dessus pour installer le support de rétention AMD
sur la pompe. Pour le socket TR4, installez le support de rétention AMD TR4 fourni dans la boite du processeur
Threadripper.
1. Intel 리텐션 브라켓을 단단히 잡고 펌프 쪽으로 길게 누릅니다.
2. Intel 리텐션 브라켓을 시계 반대 방향으로 돌려서 풉니다.
3. Intel 리텐션 브라켓을 떼어냅니다.
4. 이 단계를 역순으로 진행하여 AMD 리텐션 브라켓을 펌프에 설치합니다. SocketTR4의 경우, Threadripper CPU 소매용 상자에 포함된
AMD SocketTR4 리텐션 브라켓을 설치하십시오.
1. Die Intel-Halterung kräftig in Richtung Pumpe schieben und gedrückt halten.
2. Zum Freigeben die Intel-Halterung gegen den Uhrzeigersinn drehen.
3. Intel-Halterung herausziehen.
4. Zur Befestigung der AMD-Halterung an der Pumpe diese Schritte in umgekehrter Reihenfolge ausführen. Für den
Sockel TR4 ist die Halterung für den AMD Sockel TR4, die in der Threadripper CPU-Verpackung enthalten ist, zu
verwenden.
1. Intelリテンションブラケットをポンプ方向に押し、しっかりと固定します。
2. Intelリテンションブラケットを 反時 計回りに回して外します。
3. Intelリテンションブラケットを 引き出します。
4. AMDリテンションブラケットをポンプに取り付けるには、逆の順序でこれらの手順を実行します。SocketTR4の場合、同梱のAMD SocketTR4リテンシ
ョンブラケットをThreadripper CPUリテ ールボックス 内に取り付 けます。
C
BBB
1. 2. 3. 4.
or
INSTALLING THE PUMP - PUMP ORIENTATION
A
PREPARING THE BACKPLATE
PREPARACIÓN DE LA PLACA TRASERA
PRÉPARATION DE LA BACKPLATE
VORBEREITEN DER RÜCKPLATTE
PREPARAZIONE DELLA PIASTRA POSTERIORE
PREPARAÇÃO DA BACKPLATE
  
백플레이트 준비
バックプレートの準備
准备 Intel 背板
準備背板
Move all four sliders on the Intel backplate to the innermost positions for Socket 115X or the outermost positions for
Socket 1366.
Desliza las cuatro pestañas de la placa posterior Intel a las posiciones más interiores para el zócalo 115X o a las más
exteriores para el zócalo 1366.
Déplacez les quatre éléments mobiles de la contreplaque Intel vers l’intérieur du support pour le socket 115X ou vers
l’extérieur pour le socket 1366.
Für Sockel 115X alle vier Schieber der Intel-Rückplatte auf die innere Stellung schieben oder für Sockel 1366 auf die
äußere Stellung.
Spostare i quattro cursori sulla piastra posteriore Intel nella posizione più interna per i Socket 115X o più esterna per
il Socket 1366.
Mova todas as quatro corrediças na backplate Intel para as posições mais internas para o Soquete 115X ou as posições
mais externas para o Soquete 1366.
        Intel   Socket 115X    —  
Socket 1366.
Intel 백플레이트의 슬라이더 네 개 모두를 Socket 115X의 가장 안쪽 또는 Socket 1366의 가장 바깥쪽으로 옮깁니다.
ソ ケ ット 115Xの場合Intelバックプレートの4つすべてのスライダを一番内側に動かし、ソケット1366の場合は一番外側に動かします。
将 Intel 背板上的四个滑块移动到最内侧位置对应 Socket 115X 安装;移动到最外侧位置对应 Socket 1366 安装。
將 Intel 背板上的所有四個滑塊移動到插座 115X 的最內側位置或插座 1366 的最外側位置。
From the front of the motherboard, install the four Socket 115X/1366 standoffs.
Desde la parte delantera de la placa base, instala los cuatro separadores del zócalo 115X/1366.
Installez ensuite les quatre supports pour socket 115X/1366 sur la face avant de la carte mère.
Die vier Abstandshalter für Sockel 115X/1366 sind von der Frontseite des Mainboards aus zu befestigen.
Dalla parte anteriore della scheda madre, installare i quattro perni di fissaggio per il Socket 115X/1366.
Pela frente da placa-mãe, instale os quatro separadores de Soquete 115X/1366.
   Socket 115X/1366     .
마더보드 전면에서 소켓 115X/1366 스탠드오프 네 개를 장착하십시오.
マザーボードの前面から、4つ の ソ ケット 115X/1366スタンドオフを 取り付けます。
从主板正面安装四颗 Socket 115X/1366 螺丝柱。
從主機板正面安裝 4 個插座 115X/1366 固定座。
Install the Intel backplate on the rear of the motherboard as oriented in the picture. Please ensure the sliders fit into
the mounting holes and the backplate of CPU socket fit within the cut-out of the Intel backplate.
Instala la placa trasera Intel en la parte posterior de la placa base según la orientación de la imagen. Asegúrate de que
las pestañas encajan en los orificios de montaje y la placa trasera del zócalo de CPU encaja en la ranura de la placa
trasera Intel.
Installez la contreplaque Intel à l’arrière de la carte mère comme indiqué sur le schéma. Veuillez vous assurer que
les éléments mobiles sont bien en place dans les trous de la carte mère et que le plaque du support CPU soit bien
positionnée dans la découpe de la contreplaque Intel.
Die Intel-Rückplatte wie in der Abbildung gezeigt an der Rückseite des Mainboards befestigen. Dabei müssen die
Schieber mit den Montagelöchern übereinstimmen und die Rückplatte des CPU-Sockels muss der Aussparung der
Intel-Rückplatte entsprechen.
Installare la piastra posteriore Intel sulla parte posteriore della scheda madre, rispettando l'orientamento illustrato
nella figura. Accertarsi che i cursori si adattino ai fori di montaggio e che la piastra posteriore del socket della CPU si
adatti al preforo della piastra posteriore Intel.
Instale a backplate Intel na parte traseira da placa-mãe conforme orientado na imagem. As corrediças devem encaixar
nos furos de montagem e a backplate do soquete de CPU deve encaixar dentro do recorte da backplate Intel.
   Intel     ,    . , 
               Intel.
Intel 백플레이트를 그림에 나온 방향대로 마더보드 후면에 설치합니다. 슬라이더가 장착 구멍에 꼭 맞고 CPU 소켓 백플레이트가 Intel
백플레이트 절단부 내부에 꼭 맞는지 확인합니다.
Intelバックプレートをマザーボードの後ろ側に図示されている方向に取り付けます。スライダが取り付け穴にはまっており、CPUソ ケット の バ ック
プレートがIntelバックプレートの切り欠きの中にはまっていることを確認してください。
按照图片上的方向将 Intel 背板安装在主板后面。请确保滑块与主板 CPU 孔位契合,并且确保主板的 CPU 插槽背板不与 Intel 背
板发生冲突。
按照圖示的方向將 Intel 背板安裝在主機板背面。請確定將滑塊裝入安裝孔內,且 CPU 插座的背板裝入 Intel 背板的切口內。
INSTALLING THE BACKPLATE
INSTALACIÓN DE LA PLACA TRASERA
INSTALLATION DE LA BACKPLATE
BEFESTIGEN DER RÜCKPLATTE
INSTALLAZIONE DELLA PIASTRA POSTERIORE
INSTALAÇÃO DA BACKPLATE
  
백플레이트 설치
バックプレートの取り付け
安装 Intel 背板
安裝背板
INSTALLING THE STANDOFFS
INSTALACIÓN DE LOS SEPARADORES
INSTALLATION DES ENTRETOISE
BEFESTIGEN DER ABSTANDSHALTER
INSTALLAZIONE DEI PERNI DI FISSAGGIO
INSTALAÇÃO DOS SEPARADORES
 
스탠드오프 설치
スタンドオフの 取り付け
安装螺丝柱
安裝固定座
PREPARING THE BACKPLATE
PREPARACIÓN DE LA PLACA TRASERA
PRÉPARATION DE LA CONTREPLAQUE
VORBEREITEN DER RÜCKPLATTE
PREPARAZIONE DELLA PIASTRA POSTERIORE
PREPARAÇÃO DA BACKPLATE
  
백플레이트 준비
バックプレートの準備
准备 Intel 背板
準備背板
PREPARING THE RETENTION BRACKET
PREPARACIÓN DEL SOPORTE DE SUJECIÓN
PRÉPARATION DU SUPPORT DE RÉTENTION
VORBEREITEN DER HALTERUNG
PREPARAZIONE DEL SUPPORTO DI FISSAGGIO
PREPARAÇÃO DO SUPORTE DE RETENÇÃO
   
리텐션 브라켓 준비
リテンションブラケットの準備
准备固定支架
準備固定支架
CHANGING THE RETENTION BRACKET
CAMBIO DEL SOPORTE DE SUJECIÓN
CHANGEMENT DU SUPPORT DE RÉTENTION
AUSTAUSCHEN DER HALTERUNG
MODIFICA DEL SUPPORTO DI FISSAGGIO
TROCA DO SUPORTE DE RETENÇÃO
   
리텐션 브라켓 변경
リテンションブラケットの変更
更换 AMD 固定支架
更換固定支架
From the front of the motherboard, install the four Socket 2011/2066 standoffs.
Desde la parte delantera de la placa base, instala los cuatro separadores de zócalo 2011/2066.
Installez les quatre supports pour socket 2011/2066 sur la face avant de la carte mère.
Die vier Abstandshalter für Sockel 2011/2066 sind von der Frontseite des Mainboards aus zu befestigen.
Dalla parte anteriore della scheda madre, installare i quattro perni di fissaggio per il Socket 2011/2066.
Pela frente da placa-mãe, instale os quatro separadores de Soquete 2011/2066.
   Socket 2011/2066     .
마더보드 전면에서 소켓 2011/2066 스탠드오프 네 개를 장착하십시오.
マザーボードの前面から、4つ の ソ ケット 2011/2066スタンドオフを取り付 けます。
从主板正面安装四颗 Socket 2011/2066 螺丝柱。
從主機板正面安裝 4 個插座 2011/2066 固定座。
From the front of the motherboard, install the four AMD standoffs (AM4).
Desde la parte frontal de la placa base, instale los cuatro separadores para AMD (AM4).
Depuis l'avant de la carte mère, installez les quatre entretoises AMD (AM4).
Installieren Sie von der Vorderseite des Motherboards vier AMD-Abstandhalter (AM4).
Dalla parte anteriore della scheda madre, installare i quattro distanziatori AMD.
Instale os quatro espaçadores AMD (AM4) a partir da parte frontal da placa principal.
          AMD.
마더보드 앞쪽에서 4개의 AMD 스탠드오프 (AM4) 를 설치합니다.
マザーボートの前面から、4つのAMDスタンドオフ(AM4)を取り付 けます。
从主板的前面,安装四个 AMD 支架。
從主機板正面安裝 4 個 AMD 銅柱(AM4)。
Remove the stock AMD mounting bracket and keep the original backplate on the rear of the motherboard.
Quite el soporte de montaje para AMD de reserva y conserve la placa base original en la parte posterior de la placa
base.
Retirez le support de montage AMD standard et maintenez la plaque arrière d'origine à l'arrière de la carte mère.
Entfernen Sie die Stock-AMD-Montagehalterung und lassen Sie die Originalrückplatte an der Rückseite des
Motherboards.
Rimuovere la staffa di installazione AMD e tenere la piastra originale sulla parte posteriore della scheda madre.
Remova o suporte de montagem AMD de série e mantenha a placa de suporte original na traseira da placa principal.
    AMD          .
스톡 AMD 고정 브래킷을 제거하고 원래의 후면판을 마더보드 뒤쪽에 설치합니다.
ストックAMD取り付けブラケットを取り外し、マザーボートの背面上の元のバックプレートを保持します。
卸下常备的 AMD 装配架,使原背板保持在主板后面。
拆下原廠 AMD 安裝支架,並使原本的背板留在主機板後面。
The pump cap has a rotatable upper cap with 12 locking points for NZXT logo orientation. Depending on your
motherboard, you can orient the pump’s tube orientation to fit your needs.
La bomba tiene una tapa superior rotatoria con 12 puntos de bloqueo para orientar el logo NZXT. Dependiendo de la
placa base que tengas, puedes orientar el tubo de la bomba según tus necesidades.
Le couvercle de la pompe est orientable et dispose de 12 positions pour l’orientation du logo. Vous pouvez orienter les
tubes de la pompe en fonction de la disposition des composants votre carte mère.
Die Abdeckung der Pumpe besitzt eine drehbare Kappe, die in 12 Stellungen einrastet, um das NZXT-Logo auszurichten.
Die Richtung des Pumpenschlauchs kann so verändert werden, wie es entsprechend dem Mainboard erforderlich ist.
La parte superiore del coperchio della pompa può essere ruotato in 12 punti per l'orientamento del logo NZXT. A
seconda della scheda madre, è possibile orientare il tubo della pompa a piacimento.
A tampa da bomba tem uma tampa superior rotatória com 12 pontos de aperto para orientação do logotipo da NZXT.
Dependendo de sua placa-mãe, você pode definir a orientação do tubo da bomba conforme suas necessidades.
   ,       12  , 
   NZXT.       , 
   
펌프 캡에는 NZXT 로고 방향의 잠금 지점이 12개인 회전식 상부 캡이 있습니다. 사용하는 마더보드에 따라 요구 사항에 맞게 펌프의 튜
브 방향을 조절할 수 있습니다.
ポンプキャップには、NZXTロゴ方向用に12のロックポイントが付いた回転可能な上側キャップがあります。マザーボードによって、ポンプのチュ
ーブ方向を調整できます。
冷头上部有一个可旋转的顶盖(含 12 个锁点),用于调整 NZXT Logo 方向。根据所要安装的主板具体情况,可以按需调整泵管方向。
泵浦上部有一個可旋轉的頂蓋(含 12 個鎖點),用於調整 NZXT Logo 方向。根據所要安裝的主板具體情況,可以按需調整軟管方向。
INSTALACIÓN DE LA BOMBA - ORIENTACIÓN DE LA BOMBA
INSTALLATION DE LA POMPE - ORIENTATION DE LA POMPE
BEFESTIGEN DER PUMPE - AUSRICHTEN DER PUMPE
INSTALLAZIONE DELLA POMPA - ORIENTAMENTO DELLA POMPA
INSTALAÇÃO DA BOMBA -ORIENTAÇÃO DA BOMBA
    
펌프 설치 - 펌프 방향
ポンプの取り付け - ポンプ方向
安装冷头 - 冷头的方向
安裝泵浦 - 泵浦方向

Chatten Sie mit Ihrem NZXT Kraken X Series-Handbuch mithilfe von KI

Erhalten Sie sofortige KI-Antworten aus Ihrem NZXT Kraken X Series-Handbuch

Fragen Sie alles über NZXT Kraken X Series. Antworten stammen aus diesem Handbuch, mit den Seiten, auf denen sie basieren.

Stellen Sie eine Frage

0/1000

Empfehlen Sie Kraken X Series?

Ja Nein

Häufig gestellte Fragen

A

The range includes the Kraken X53, Kraken X63, and Kraken X73. The X53 uses two 120 mm Aer RGB fans, the X63 uses two 140 mm fans, and the X73 uses three 120 mm Aer RGB fans.

Ist diese Antwort hilfreich?

A

The cooler supports Intel LGA 1700, 1200, 115X, 2011, and 2066 sockets, as well as AMD AM4 and TR4 platforms. Use the matching standoffs, backplate settings, and retention bracket for the selected platform.

Ist diese Antwort hilfreich?

A

Yes. The upper pump cap has 12 locking positions, allowing the logo orientation to be adjusted to suit tube routing and motherboard layout.

Ist diese Antwort hilfreich?

A

The included fan splitter can connect the fans to a motherboard fan header or a compatible fan controller. Follow the motherboard or controller guidance for appropriate fan-header use.

Ist diese Antwort hilfreich?

A

The installation uses a 3-pin pump tach connection, SATA power from the power supply, and a Micro-USB connection to an internal USB 2.0 motherboard header. Compatible RGB devices connect through the breakout cable.

Ist diese Antwort hilfreich?

A

Yes. For Socket TR4, use the AMD SocketTR4 retention bracket supplied inside the Threadripper CPU retail box. Align the four screws correctly and tighten them in the stated sequence.

Ist diese Antwort hilfreich?

A

New Kraken X, X RGB, and Z coolers are listed with a six-year warranty. Warranty service requires proof of purchase and may involve a support request and approved return authorization.

Ist diese Antwort hilfreich?

M: gpt-5.6-terra

Vorteile und Nachteile

Vorteile

  • Supports Intel LGA 1700, 1200, 115X, 2011, and 2066, plus AMD AM4 and TR4 platforms.
  • Available in X53, X63, and X73 formats with 120 mm or 140 mm Aer RGB fan configurations.
  • Rotatable pump cap offers 12 locking positions for flexible logo orientation and tube routing.
  • Includes RGB connection hardware, fan splitter, SATA power, Micro-USB cable, and mounting components.
  • New Kraken X, X RGB, and Z coolers are covered by a listed six-year warranty.
VS

Nachteile

  • Radiator and fan clearance must be checked carefully because mounting layouts vary by case.
  • TR4 installation requires a retention bracket included with the Threadripper CPU retail package.
  • A motherboard BIOS setting may need adjustment if the CPU_FAN header is not used.
  • Multiple power, USB, tach, fan, and RGB connections add installation steps.
  • NZXT CAM software is needed for the full connected monitoring and lighting-control experience.
M: gpt-5.6-terra

Produkt Spezifikation

Typ

intern (geschlossenes System)

Kuehlblock

CPU, Kupfer

Kompatibilitaet

1150, 1151, 1155, 1156, 1200, 1356, 1366, 1700 (siehe Hinweis), 2011-0, 2011-1, 2011-3, 2066, AM2, AM2+, AM3, AM3+, AM4, AM5 (siehe Hinweis), FM1, FM2, FM2+, TR4, sTRX4, sWRX8, SP3

Ausgleichsbehaelter

k. A.

Pumpe

12 V

Anschluesse

k. A.

Beleuchtung

LED (RGB)

Herstellergarantie

6 Jahre

Hinweis

Das AMD-TR4-Upgrade-Kit ist bei der Threadripper-CPU enthalten. Achtung: Das Montageset fuer Sockel 1700 ist moeglicherweise noch nicht enthalten (enthalten ab Produktionsdatum 12/2021). Das 1700-Upgrade-Kit ist kostenlos erhaeltlich. Achtung: Das Montageset fuer Sockel AM5 ist moeglicherweise noch nicht enthalten. Das AM5-Upgrade-Kit ist kostenlos erhaeltlich.

M: gpt-5.6-terra

Produkt Beschreibung

NZXT Kraken X Serie - Kraken X 3 - Kostenlos lesen, herunterladen und drucken

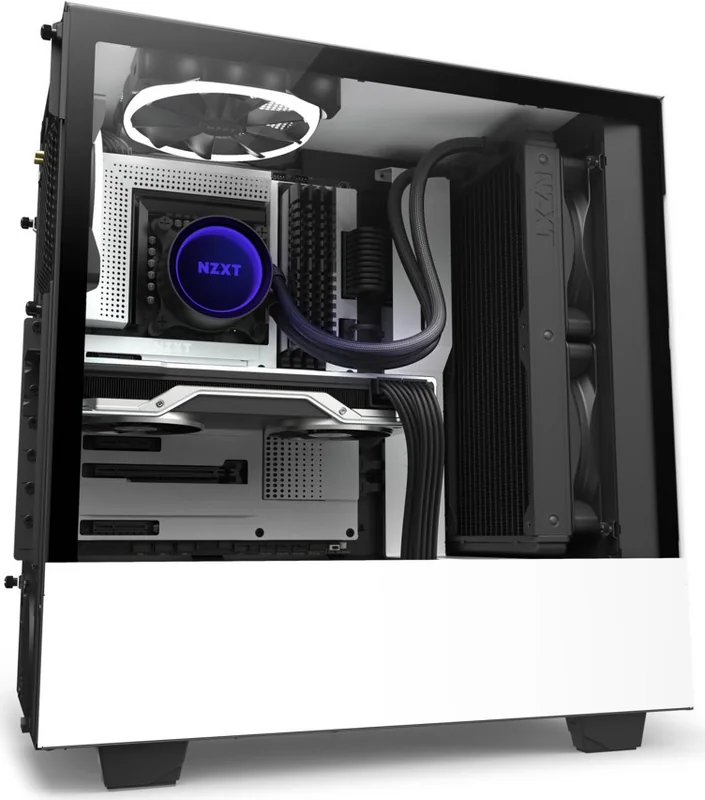
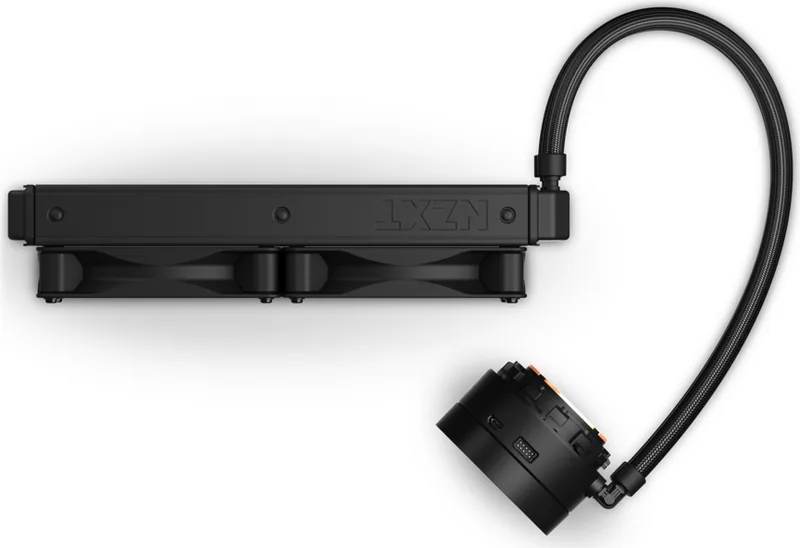
Die NZXT Kraken X RGB Serie ist eine All-in-One-Wasserkuehlungsreihe fuer PC-Bauer, die eine saubere, konfigurierbare Kuehlloesung mit abgestimmter RGB-Beleuchtung wuenschen. Die Serie ist in den Varianten X53, X63 und X73 erhaeltlich und kombiniert eine Pumpen- und Radiatoreinheit mit Aer RGB-Lueftern. Sie bietet mehrere Radiatorgroessen fuer kompatible Gehaeuse und Systemlayouts.

Flexible Passform fuer moderne CPU-Plattformen

Die Installationsunterstuetzung deckt eine breite Auswahl an Intel- und AMD-Sockeln ab. Das mitgelieferte Montagematerial unterstuetzt Intel LGA 1700, 1200, 115X, 2011 und 2066 sowie AMD AM4. AMD-TR4-Systeme verwenden die passende Halterung aus dem Threadripper-CPU-Paket. Spezielle Backplate-, Abstandshalter- und Halterungskomponenten helfen Bauherren, den Kuehler an ihre gewaehlte Plattform anzupassen.

Die Pumpe verfuegt ueber eine drehbare Abdeckung mit 12 Rasterpositionen, sodass das NZXT-Logo nach der Installation korrekt ausgerichtet bleiben kann. Dieses Detail erleichtert auch die Anpassung an unterschiedliche Schlauchfuehrungen und Mainboard-Layouts. Die Pumpe wird bei Intel- und AMD-AM4-Systemen mit Rendelmuttern befestigt, waehrend die TR4-Installation einem nummerierten Anzugsmuster folgt.

RGB-Luefter und unkomplizierte Anschluesse

Jedes Modell umfasst Aer RGB-Luefter: Das X53 beinhaltet zwei 120-mm-Luefter, das X63 zwei 140-mm-Luefter und das X73 drei 120-mm-Luefter. RGB-Verbindungen von Luefter zu Luefter ermoeglichen die serielle Verbindung kompatibler Aer RGB-Luefter, waehrend das Breakout-Kabel die Hauptanschluesse fuer Pumpenueberwachung, SATA-Stromversorgung, RGB-Beleuchtung und USB-Kommunikation bereitstellt.

Der mitgelieferte Lueftersplitter kann Radiatorluefter mit einem Mainboard-Anschluss oder einer separaten Lueftersteuerung verbinden. Das Pumpen-Tachokabel wird an einen CPU_FAN- oder AIO_PUMP-Anschluss angeschlossen, und das Micro-USB-Kabel wird mit einem internen USB-2.0-Anschluss verbunden. Fuer den Pumpenkabelsatz ist SATA-Stromversorgung erforderlich. Anschliessend kann die NZXT-CAM-Software installiert werden, um die Systemintegration und Kuehlersteuerung zu unterstuetzen.

Installationshinweise

Die Radiatormontage kann je nach Gehaeuselayout direkt oder indirekt erfolgen. Bei der Direktmontage werden lange Luefterschrauben fuer die Luefter und kurze Gehaeuseschrauben fuer den Radiator verwendet. Bei der indirekten Montage werden die Luefter zwischen Radiator und Gehaeuse platziert und die laengeren Schrauben verwendet. Unterlegscheiben sollten immer verwendet werden, um Schaeden waehrend der Installation zu vermeiden.

Hinweise

  • Bestaetigen Sie den fuer den Radiator verfuegbaren Platz im Gehaeuse, bevor Sie X53, X63 oder X73 waehlen.
  • Pruefen Sie die Verfuegbarkeit von Mainboard-Anschluessen fuer CPU_FAN oder AIO_PUMP sowie internes USB 2.0.
  • Bewahren Sie den Kaufbeleg fuer Garantieleistungen auf. Kraken X-, X RGB- und Z-Kuehler sind mit einer sechsjaehrigen Garantie aufgefuehrt.
  • Befolgen Sie die Vorgaben zu Schraubenlaenge und Unterlegscheiben, um Schaeden am Radiator zu vermeiden.
M: OA-GPT-5-NAN

© Copyright 2026 Manual.ly