Manual.ly Logo

Edifier B700 Bedienungsanleitung

0,0 · 0 Bewertungen

PDF-Handbuch · 7 Seiten

Deutsch

M: QW-35-FL
Seite

/ 7

Loading...
136baab1252c120cf86dd9b4c6fb8b20bd00 page 1
1. Optical/coaxial input
• Connect audio source (DVD, Set-Top Box, etc.) to "OPT/COAX" input port on the rear panel of the soundbar using fiber optic
audio cable or coaxial cable (coaxial cable not included);
• Press the " " power switch button on the soundbar or the "OPT/COAX" button on the remote control to switch to
optical/coaxial input. (The display window shows "OPT/COAX");
• Play music on the connected device and adjust the settings to a desired level.
2. AUX input
• Connect audio source to the "AUX" input port on the rear panel of the soundbar using a 3.5mm-RCA audio cable;
• Press the " " power switch button on the soundbar or the "AUX" button on the remote control to switch to AUX input.
(The display window shows "AUX");
• Play music on the connected device and adjust the settings to a desired level.
Note:
Only the standard PCM audio signals (44.1KHz/48KHz/96KHz/192KHz) and Dolby audio-coded signals function in
optical/coaxial input.
3. Bluetooth input
• Press the " " power switch button or the " " button on the soundbar to switch to Bluetooth input. Or press the " " button
on the remote control to switch to Bluetooth mode. The speaker will auto-enter Bluetooth pairing state. (The Bluetooth "BT"
icon will show and blink in the display window);
• Select "EDIFIER B700" in your device setting to connect. (The "BT" icon will show and constantly lit in the display window after
connected);
• Play music on the connected device and adjust the settings to a desired level.
Note:
1. PIN code for connection is "0000" if needed.
2. To enjoy all Bluetooth functions of this product, please ensure your device supports A2DP and AVRCP profiles.
1. HDMI OUT(ARC/eARC) mode:
• Connect the "HDMI ARC" connector on the TV to the "HDMI OUT(ARC/eARC)" output port on the back panel of the soundbar
using a 4K HD HDMI cable.
• Press the " " power switch button on the soundbar or the "HDMI ARC" button on the remote control to switch to HDMI ARC
input mode. (The display window shows "ARC");
• HDMI ARC will return the audio signal to the speaker via HDMI cable.
2. HDMI 1/HDMI 2 mode:
• Connect audio source (DVD, Set-Top Box, etc.) to "HDMI IN1" or "HDMI IN2" input port on the back panel of soundbar using
4K HD HDMI cable;
• Connect the "HDMI" connector on the TV to the "HDMI OUT(ARC/eARC)" output port on the back panel of the soundbar using
another HDMI cable. The audio source video signal will output to the TV. (Note: You have been supplied with one HDMI cable;
additional cables may be necessary);
• Press the " " power switch button on the soundbar or the "HDMI 1/2" button on the remote control to switch to HDMI 1 or
HDMI 2 input mode. (The display window shows "HDMI 1" / "HDMI 2").
Note:
1. All HDMI ports of the product support 4K video format.
2. Supports HDMI 2.1, HDCP, CEC, Dolby Vision
®
, HDR10+.
English
English
English
English
English
What’s in the Box
EN Important safety instruction
Excessively loud music may lead to hearing loss. Please keep the volume in a safe range.
Correct Disposal of this product. This marking indicates that this product should not be disposed with other
household wastes throughout the EU. To prevent possible harm to the environment or human health from
uncontrolled waste disposal, recycle it responsibly to promote the sustainable reuse of material resources. To return
your used device, please use the return and collection systems or contact the retailer where the product was
purchased. They can take this product for environmental safe recycling.
• Please read the instructions carefully. Keep it in safe place for future reference.
• Use only accessories approved by the manufacturer.
• Install the instrument properly by following the instructions in the device connection section.
• Using the product in a 0-35°C environment is recommended. Shipping and storing the product in a 0-35°C environment is
recommended.
• To reduce the risk of fire and electric shock, do not expose the product to rain or moisture.
• Do not use this product near water. Do not immerge the product into any liquid or have it exposed to dripping or splashing.
• Do not install or use this product near any heat source (e.g. radiator, heater, stove, or other devices that generate heat).
• Do not place any object filled with liquids, such as vases on the product; neither should any open fire, such as lighted candles
be placed on the product.
• Do not block any ventilation openings. Do not insert any object into ventilation openings or slots. It may cause fire or electric
shock.
• Keep sufficient clearance around the product to maintain good ventilation (minimum 5cm is recommended).
• Do not force a plug into the jack. Before connection, check for blockage in the jack and whether the plug matches the jack and
is oriented to the right direction.
• Keep the provided accessories and parts (such as screws) away from children to prevent from being swallowed by mistake.
• Do not open or remove the housing yourself. It may expose you to dangerous voltage or other hazardous risks. Regardless
the cause of damage (such as damaged wire or plug, exposure to liquid splash or foreign object falling in, exposure to rain or
moisture, product not working or being dropped, etc.), the repair has to be performed by an authorized service professional
immediately.
• Before cleaning the product with dry cloth, always turn off the product and disconnect the power plug first.
• Never use strong acid, alkali, gasoline, alcohol, or other chemical solvents to clean the product surface. Use only neutral
solvent or clear water for cleaning.
• The product must be used at an altitude of lower than 2000m.
• Do not connect this product to the same power outlet used by an appliance controlled by an inverter or motor (such as a
refrigerator, washing machine, microwave oven or air conditioner). Power supply noise may cause this product to malfunction
or produce significant noise based on how the appliance is used. If it is not accessible to use a separate power outlet, please
connect a power noise filter between this product and the power outlet.
User manual
Subwoofer
4K HD HDMI cable
Remote control
AAA battery x1 Plastic wall anchor x5 Hook x2
Screw for wall mounting x5
(KA5x40)
3.5mm-RCA audio cable
16. Soundbar pairing button on the subwoofer
The B700 Soundbar has been paired with the subwoofer
before leaving factory. The wireless connection is supposed
to resume automatically when both active speaker and
subwoofer are powered on, and the red indicator will be
constantly lit. If the wireless connection fails to resume,
please follow the steps below to complete the pairing again.
• Power on the subwoofer, the status indicator should blink
slowly, which means no active wireless connection;
• Press the "PAIR" button on the back panel of the
subwoofer to put it into pairing mode. The status indicator
will blink rapidly;
• Press the "PAIR" button on the back panel of the active
speaker, or press and hold the " " button for 3s on the
remote control to put it into pairing mode. The "PAIR" icon
will show and blink rapidly in the display window;
• Wait until the status indicator on the subwoofer is lit
constantly and the "PAIR" icon is lit for 2s in the display
window on the active speaker. Then the pairing is done and
a wireless connection is made.
17. Status indicator
18. Power switch
19. Power cable port
1. As the illustration shows, press the remote control battery
cover downward with thumb and follow the arrow direction
to remove the cover, insert a AAA battery into it(note the
"+" and "-" pole).
2. The batteries life are normally about 6 months; please
replace them when the remote control is not sensitive or
the control distance is shortened.
3. Never use old and new batteries together.
Note:
1. Do not place the remote control in places that are hot and
humid.
2. Do not charge the batteries.
3. Remove the batteries when unused for a long period of time
to avoid batteries leakage.
4. The batteries should not be exposed to excessive heat such
as direct sun, fire or similar.
5. Danger of explosion if batteries are incorrectly replaced.
Replace only with the same or equivalent type.
Adhere the wall mount bracket to an appropriate position on the wall and align the centerline of the wall mount bracket with that
of the TV, then mark 4 holes.
Note: Please make sure the wall can withstand the weight of this product. Improper installation may lead to accidents, injuries or
product damage.
Drill 4 holes (Depth: 40mm, Hole size: 8mm) in the wall, then knock wall anchor into holes.
Note:
Dimension of the hole may vary depending on wall materials, please adjust drill size to existing conditions for proper installation.
Align mounting bracket with the holes and use included screws to fix wall mount bracket.
Note: The included screws are only suitable for walls of concrete and brick structure, not for walls with gypsum board, foam
composite board and wood structure. Please consult a professional to ensure safety if you need to install in gypsum board and
wooden structure walls.
Remove the two screws on the back of the soundbar, fix 2 included hooks on it, and then hang the soundbar on the wall mount
bracket.
Note: Please make sure all audio cable connections are secure before mounting the speaker.
Warning:
1. Please follow installation instructions to avoid damage to your product.
2. Please make sure the mounting height is lower than 2m.
Fiber optic audio cable Power cable x2 Power adapter
Soundbar
Wall mount bracket
Connection
Soundbar Wall Mount Bracket Installation
Power output: L/R/C: 15W+15W+15W
Ls/Rs: 15W+15W
Ltm/Rtm: 15W+15W
Subwoofer: 70W
Frequency response:
45Hz-20KHz
Audio input:
HDMI 1, HDMI 2, Optical, Coaxial, Bluetooth, AUX
Audio output:
HDMI OUT (ARC/eARC)
Power adapter information:
Manufacturer: EDIFIER
Model: ADT-60180
Input: 100-240V~50/60Hz 1.5A
Output: 18V 3A
Declaration for EU
Frequency Band (Bluetooth): 2.402GHz ~ 2.480GHz
Frequency Band (5.8G): 5.725GHz ~ 5.820GHz
RF Power Output (Bluetooth):
≤
10 dBm (EIRP)
RF Power Output (5.8G):
≤
14 dBm (EIRP)
There is no restriction of use.
Note:
• Images are for illustrative purposes only and may differ from the actual product.
• For the need of technical improvement and system upgrade, information and specifications contained herein may be slightly
different from actual product. If any difference is found, the actual product prevails.
No sound
• Check if the speaker is ON.
• Try to turn up the volume using the volume control or remote control.
• Ensure the audio cables are firmly connected and the input is set correctly on the speakers.
• Check if there is a signal output from the audio source.
Cannot connect via Bluetooth
• Make sure the speaker is switched to Bluetooth input. If it is in other audio input modes, Bluetooth will not
connect. Disconnect from any Bluetooth device by pressing and holding the " " button, then try again.
• Effective Bluetooth transmission range is 10 meters; please ensure that operation is within the range.
• Try another Bluetooth device for connection.
The B700 does not turn on
• Check if main power is connected, or if the wall outlet is switched on.
Noise coming from speakers
• EDIFIER speakers generate little noise, while the background noise of some audio devices are too high.
Please unplug audio cables and turn the volume up, if no sound can be heard at 1 meter away from the
speaker, then there is no problem with this product.
To learn more about EDIFIER, please visit www.edifier.com
For EDIFIER warranty queries, please visit the relevant country page on www.edifier.com and review the section
titled Warranty Terms.
USA and Canada: [email protected]
South America: Please visit www.edifier.com (English) or www.edifierla.com (Spanish/Portuguese) for local
contact information.
* This plug type is meant for illustration purpose only.
Operating Instructions
English
English
English
Troubleshooting
Specifications
Manual
B700
Soundbar
Subwoofer
Mark the position of the punch hole
Fix wall mount bracket
Place soundbar on the wall mount bracket
HDMI output
(ARC/eARC)
HDMI 1 input
HDMI 2 input
AUX input
Optical input
Drill hole in the wall
●
HDMI input/output
●
Audio input
●
The "BT" icon will show and constantly
lit in the display window
Dolby Atmos
®
This product supports Dolby Atmos
®
.
Dolby Atmos
®
produces astonishing audio experiences by its advanced technology and all-around audio configuration featuring
overhead speakers.
1. Dolby Atmos
®
is only available in HDMI mode
2. Make sure the audio and video source content is Dolby Atmos
®
3. Make sure that "Bitstream or RAW" format is selected for the audio output when using a Blu-ray DVD player or other devices
4. When reading Dolby Atmos
®
/Dolby
®
Digital/PCM format, the soundbar displays DOLBY ATMOS/DOLBY AUDIO/PCM respectively
Dolby Vision
®
This product supports transmitting video signals of Dolby Vision
®
Compatible.
Dolby Vision
®
Compatible revolutionizes your viewing experience in theaters and on TV with breathtaking brightness, contrast
ratio and color.
Dolby technology
●
(same operation for the "11" point)
16
19
17
1
8
1
2
A B AB
B
3
4
VOICE
MOVIE MUSIC
GAME
HDMI 1/2 HDMI ARC
OPT/COAX AUX
BASS TREBLEVOLUME
VOICE
MOVIE MUSIC
GAME
HDMI 1/2 HDMI ARC
OPT/COAX AUX
BASS TREBLEVOLUME
or
or
or
VOICE
MOVIE MUSIC
GAME
HDMI 1/2 HDMI ARC
OPT/COAX AUX
BASS TREBLEVOLUME
VOICE
MOVIE MUSIC
GAME
HDMI 1/2 HDMI ARC
OPT/COAX AUX
BASS TREBLEVOLUME
EDIFIER B700
VOICE
MOVIE MUSIC
GAME
HDMI 1/2 HDMI ARC
OPT/COAX AUX
BASS TREBLEVOLUME
English
Use only with the cart, stand, tripod, bracket, or table specified by the manufacturer, or sold with the apparatus.
When a cart is used, use caution when moving the cart/apparatus combination to avoid injury from tip-over.
This symbol is to alert the user to the presence of un-insulated dangerous voltage within the product's enclosure
that may be of sufficient magnitude to constitute a risk of electric shock to persons.
This symbol is to warn the user not to disassemble the enclosure of the product and there is no user-replaceable
part inside. Take the product to an authorized service center for repair.
This symbol indicates that the product is a CLASS II or double insulated electrical device with no earth requirement.
For wireless product:
1.
Wireless product may generate shortwave radio frequencies and interfere with the normal use of other electronic devices or
medical equipment.
2. Turn off the product when it’s disallowed. Do not use the product in medical facilities, on airplane, at gas stations, near
automatic gates, automatic fire alarm system or other automated devices.
3. Do not use the product in the vicinity of a pacemaker within a 20cm range. The radio waves may affect the normal operation
of the pacemaker or other medical devices.
This symbol indicates that the product is for indoor use only.
Power warning:
1. Place the product near the power outlet for easy use.
2.
Before use, make sure that the operating voltage is the same as your local power supply. Correct operating voltage can be found
on the product plate.
3. For safety purpose, unplug the product during lightning storms or when unused for extended periods of time.
4. Under normal conditions, the power supply may get hot. Please keep good ventilation in the area and exercise caution.
5. Product nameplate and safety warning labels on the housing or bottom of the product or power adaptor.
The MAINS plug is used as the disconnect device, the disconnect device shall remain readily operable.
1. Power on/off
2. Sound effect mode
MOVIE mode
MUSIC mode
VOICE mode
GAME mode
3. Mute/mute off
Press: mute/mute off
Press and hold for 3s: soundbar pairing button
4. Dimmer
Adjust the brightness of the display window
5. Bluetooth input
Press: Bluetooth input
Press and hold: disconnect Bluetooth (Bluetooth mode)
6. Previous track/next track
(Bluetooth connected)
7. Volume control
8. Play/pause
(Bluetooth connected)
9. Treble volume control
10. Bass volume control
11. HDMI output (ARC/eARC)
12. HDMI 1/HDMI 2 input
13. AUX input
14. Optical/coaxial input
Remote Control
1
3
5
7
9
10
13
12
14
2
4
6
11
8
VOICE
MOVIE MUSIC
GAME
HDMI 1/2 HDMI ARC
OPT/COAX AUX
BASS TREBLEVOLUME
Functional Operation
1. Display window
2. Receiver window for remote control
3. Bluetooth input
Press: Bluetooth input
Press and hold: disconnect Bluetooth (Bluetooth connected)
4. Volume down
Press: volume down
Press and hold: previous track (Bluetooth connected)
5. Volume up
Press: volume up
Press and hold: next track (Bluetooth connected)
6. Power switch/mode switch button
Press: switch mode “HDMI ARC → HDMI 1 →
HDMI 2 → OPT → COAX → Bluetooth → AUX”
Press and hold: power on/off
7. eARC/ARC output
8. HDMI IN1 input
9. HDMI IN2 input
10. Power cable port
11. Subwoofer pairing button on the soundbar
12. USB port (service only)
13. Optical input
14. Coaxial input
15. AUX input
1 2
3
4
5
6
8
9
7
121110
13
15
14
Soundbar
Front view
Top view
Back view
●
NOTICE:
For the need of technical improvement and system upgrade, information contained herein may be subject to change from time
to time without prior notice.
Products of EDIFIER will be customized for different applications. Pictures and illustrations shown on this manual may be slightly
different from actual product. If any difference is found, the actual product prevails.
Model: EDF100026
Edifier International Limited
P.O. Box 6264
General Post Office
Hong Kong
Tel: +852 2522 6989
Fax: +852 2522 1989
www.edifier.com
© 2022 Edifier International Limited. All rights reserved.
Printed in China
@Edifier_Global @Edifier_Global@Edifierglobal
For more information, please visit our website:
www.edifier.com

Chatten Sie mit Ihrem Edifier B700-Handbuch mithilfe von KI

Erhalten Sie sofortige KI-Antworten aus Ihrem Edifier B700-Handbuch

Fragen Sie alles über Edifier B700. Antworten stammen aus diesem Handbuch, mit den Seiten, auf denen sie basieren.

B700 Wartungsplan

Erinnere mich, wenn eine Wartung faellig ist
Alle 6 Monate
Batterie der Fernbedienung wechseln

Die Lebensdauer der AAA-Batterie beträgt normalerweise etwa 6 Monate. Wechseln Sie sie aus, wenn die Fernbedienung nicht mehr reagiert oder die Steuerdistanz kürzer wird.

Bei Bedarf
Produktoberfläche reinigen

Schalten Sie das Produkt aus und trennen Sie es vom Stromnetz, bevor Sie es mit einem trockenen Tuch reinigen. Verwenden Sie nur neutrale Lösungsmittel oder klares Wasser; verwenden Sie niemals starke Säuren, Laugen, Benzin oder Alkohol.

Kostenlose Wartungserinnerungen

Abgestimmt auf Ihr Kaufdatum. Immer kostenlos, jederzeit abbestellbar.

Mit dem Absenden stimmen Sie der Datenschutzerklarung zu. Sie konnen sich in jeder E-Mail mit einem Klick abmelden.
M: qwen/qwen3.8-flash

Stellen Sie eine Frage

0/1000

Empfehlen Sie B700?

Ja Nein

Häufig gestellte Fragen

A

Verwenden Sie ein HDMI-Kabel, um den HDMI ARC-Anschluss des Fernsehers mit dem HDMI OUT ARC-Anschluss der Soundbar zu verbinden. Oder verbinden Sie sich über ein optisches Kabel für das Audiosignal. Wenn Sie ein einfacheres Setup bevorzugen, stellen Sie sicher, dass der HDMI ARC-Modus in der Fernbedienung ausgewählt ist, um die Lautstärke mit der Fernsehfernbedienung zu steuern. Überprüfen Sie das Anzeige-Fenster auf ARC-Bestätigung, um eine erfolgreiche Verbindung sicherzustellen.

Ist diese Antwort hilfreich?

A

Ja, der B700 unterstützt Dolby-Atmos-Technologie. Dies ist nur im HDMI-Modus verfügbar, wenn eine Quelle angeschlossen wird, die Dolby-Atmos-Inhalte ausgibt. Stellen Sie sicher, dass der HDMI-Anschluss sowohl für Audio- als auch für Videosignal-Ausgaben verwendet wird, um das immersive Audio-Erlebnis ordnungsgemäß auf Ihrer kompatiblen TV-Aufstellung zu nutzen.

Ist diese Antwort hilfreich?

A

Der Standard-PIN-Code für die Bluetooth-Verbindung lautet 0000, wenn das Gerät während des Pairing-Vorgangs nach einem Kennwort fragt. Wählen Sie EDIFIER B700 in Ihren Geräteeinstellungen aus, um die Verbindung einzuleiten. Warten Sie, bis das BT-Symbol im Anzeige-Fenster dauerhaft beleuchtet ist, um zu bestätigen, dass die Verbindung erfolgreich hergestellt wurde.

Ist diese Antwort hilfreich?

A

Beide Einheiten sind ab Werk vorgepaart. Bei Verbindungsfehlern schalten Sie den Subwoofer ein und drücken Sie die PAIR-Taste an der Rückseite der Soundbar oder halten Sie die Stummschalt-Taste für 3 Sekunden auf der Fernbedienung gedrückt. Warten Sie, bis die Indikatorlampen aufhören zu blinken und eine konstante Verbindung zeigen. Stellen Sie sicher, dass beide Geräte während dieses Vorgangs eingesteckt sind.

Ist diese Antwort hilfreich?

A

Nein, die mitgelieferten Schrauben sind nur für Beton- und Ziegelstrukturen geeignet. Die Installation an Gips- oder Holzstrukturen kann professionelle Hilfe erfordern, um die Sicherheit zu gewährleisten und Sturzgefahren zu verhindern. Konsultieren Sie einen professionellen Installateur, wenn Ihre Wände nicht aus Standardbeton- oder Ziegelmaterial bestehen, um eine ordnungsgemäße Montagestabilität sicherzustellen.

Ist diese Antwort hilfreich?

A

Die Hauptkanäle liefern 15W für jeden Links, Rechts und Zentrums-Lautsprecher. Die Surround-Kanäle sind jeweils 15W und der Subwoofer bietet 70W Leistung. Diese Konfiguration sorgt für eine ausgewogene Klangabdeckung im gesamten Raum, ohne dass externe Verstärker für die üblichen Heimkino-Nutzungsszenarien erforderlich sind.

Ist diese Antwort hilfreich?

M: QW-35-FL

Vorteile und Nachteile

Vorteile

  • Unterstützt Dolby Atmos für immersives 3D-Audio-Erlebnis im HDMI-Modus mit Overhead-Lautsprechern.
  • Enthält einen leistungsstarken 70W drahtlosen Subwoofer für tiefen Bass und tiefen Frequenzbereich.
  • Verfügt über HDMI ARC- und eARC-Ausgänge für eine vereinfachte Ein-Kabel-Verbindung zum Fernseher.
  • Mehrere Eingangsoptionen einschließlich Bluetooth 5.8G und Optisch Koaxial für verschiedene Geräte.
  • Komplettes Wandmontage-Kit enthalten für flexible Installation und Platzersparnis.
VS

Nachteile

  • Koaxialkabel ist nicht im Lieferumfang für optische/koaxiale Anschlüsse enthalten.
  • Montageschrauben sind nur für Beton- oder Ziegelwände geeignet, keine Trockenwände.
  • Subwoofer-Pairing muss manuell ausgeführt werden, falls die Werkverbindung verloren geht.
  • USB-Port ist nur für Wartungszwecke und unterstützt keine Medienwiedergabe.
  • Wandmontage erfordert das Bohren von 8mm-Löchern, was empfindliche Wandoberflächen beschädigen kann.
M: QW-35-FL

Produkt Spezifikation

Typ

Soundbar mit Subwoofer

Kanäle

5.1.2

Leistung

174W RMS

Frequenzbereich

45Hz - 20kHz

Audiodecoder

Dolby Atmos

HDR

Dolby Vision, HDR, HDR10, HDR10+

Videoanschlüsse

2x HDMI-Eingang, 1x HDMI 2.1 Ausgang

Audioanschlüsse

eARC, 1x Digitaler Audioeingang (Koaxial), 1x Digitaler Audioeingang (optisch), 1x AUX-Eingang (3,5mm-Klinke)

Drahtlos

Bluetooth 5.0

Farbe

Schwarz

Abmessungen

84,99x7,01x11,99cm (BxHxT)

Subwoofer-Abmessungen

24,99x37,21x30,00cm (BxHxT)

Lieferumfang

Soundbar, 1x Kabelloser Subwoofer

M: QW-35-FL

Produkt Beschreibung

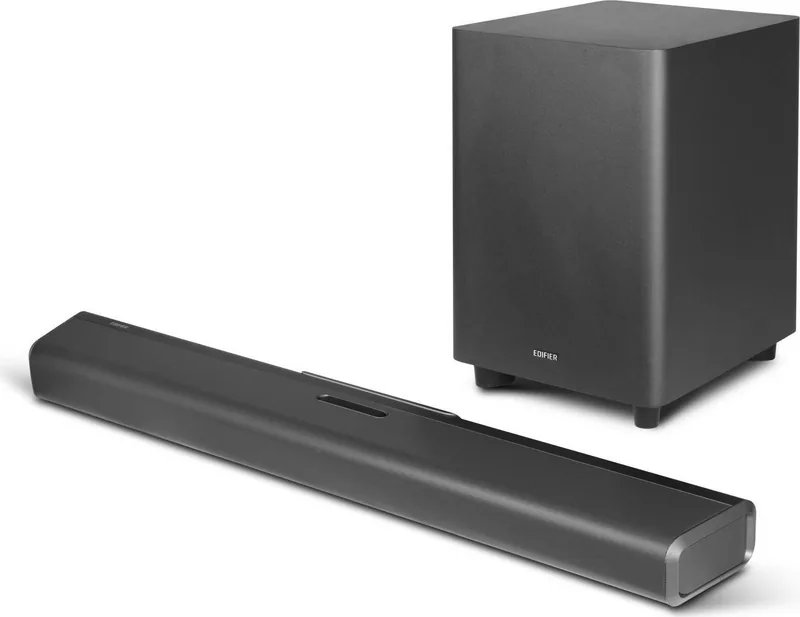
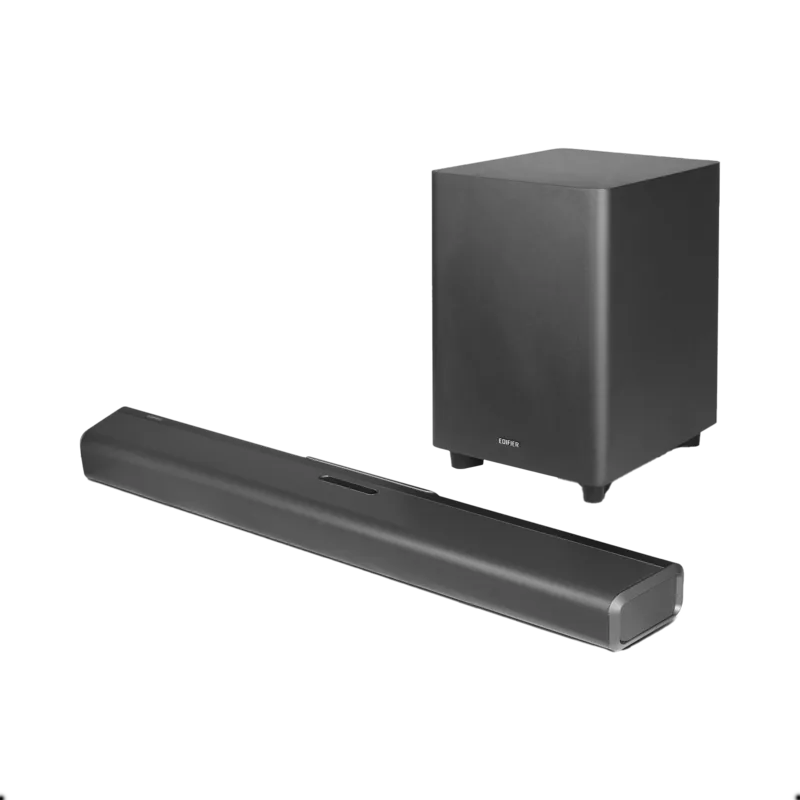
Übersicht über das Edifier B700

Die Heimunterhaltung hat sich erheblich weiterentwickelt, und das Edifier B700 sticht als erstklassige Soundbar-Lösung für Audiophile und Gelegenheitshörer gleichermaßen hervor. Dieses Gerät verwandelt Standard-Fernsehaudio in ein kinoreifes Erlebnis, ohne dass komplexe Aufbauten oder zusätzliche Lautsprecher an jeder Wand erforderlich sind. Der Soundbar liefert einen reichen, detaillierten Klang, der den Raum erfüllt, und macht Kinonächte und Spielsessions erheblich immersiver. Ob Sie actiongeladene Filme ansehen oder Musik über einen Streaming-Dienst hören, die gebotene Klarheit sorgt dafür, dass jeder Dialog und jeder Soundtrack-Note mit Präzision gehört wird. Die eingebaute Technologie unterstützt erweiterte Formate wie Dolby Atmos und schafft eine dreidimensionale Klanglandschaft, die den Hörer mit realistischer Audio-Platzierung umgibt.

Konnektivität und Eingangsoptionen

Audiophile werden die umfassenden Konnektivitätsoptionen in diesem System schätzen. Es unterstützt HDMI ARC- und eARC-Verbindungen, was den Prozess des Anschlusses an moderne Fernseher vereinfacht und gleichzeitig die Lautstärkeregelung über die TV-Fernbedienung ermöglicht. Sie können auch HDMI 1- und HDMI 2-Eingänge für andere Geräte wie Spielekonsolen oder DVD-Player verwenden, um einen flexiblen Medien-Sharing zu gewährleisten. Für ältere Aufbauten bleiben die optische und koaxiale Eingänge voll funktionsfähig, was eine breite Kompatibilität über verschiedene Medienquellen und veraltete Geräte hinweg sicherstellt. Beim Zugriff auf das Edifier B700 Handbuch finden Sie detaillierte Anleitungen dazu, wie Sie zwischen diesen Eingängen nahtlos über die Fernbedienung und Schnittstellentasten wechseln.

Drahtloses Streaming und Audioleistung

Drahtlose Freiheit ist ein weiteres Highlight dieses Audiosystems, das die Benutzerbequemlichkeit vor Unordnung priorisiert. Das eingebaute Bluetooth-Modul ermöglicht müheloses Streaming von Smartphones oder Tablets, ohne verworrene Kabel, die das Setup behindern. Es unterstützt die A2DP- und AVRCP-Profile, wodurch hochwertige Musikübertragung und Track-Steuerungsfunktionen gewährleistet werden. Darüber hinaus verfügt das Gerät über einen dedizierten Subwoofer, der tiefe Frequenzen effektiv und unabhängig verarbeitet. Diese drahtlose Bass-Einheit verbindet sich mit der Haupt-Soundbar und liefert ein tiefes, kraftvolles Bass-Spektrum, das Standard-TV-Lautsprecher allein einfach nicht erreichen können.

Sicherheits- und Installationsüberlegungen

Sicherheit und Installation werden bei der Gestaltung dieses Produkts sorgfältig berücksichtigt, um Unfälle zu verhindern und die Langlebigkeit zu gewährleisten. Das Kit enthält alles, was für die Wandmontage benötigt wird, was eine platzsparende Installation für viele Wohnzimmer mit begrenztem Bodenplatz möglich macht. Benutzer sollten jedoch beachten, dass die mitgelieferten Schrauben am besten für Beton- oder Ziegelwände geeignet sind, daher kann die Installation auf Trockenwänden professionelle Hilfe erfordern, um die strukturelle Integrität zu gewährleisten. Das System verfügt zudem über mehrere Klangmodi, die speziell für Sprach-, Musik- und Gaming-Szenarien optimiert sind, um unterschiedliche Inhaltstypen zu bedienen. Der Netzadapter ist für die globale Spannungs-Kompatibilität ausgelegt und warnt vor der Verwendung in der Nähe von Wasser oder Hitzequellen, um elektrische Gefahren zu verhindern. Wenn Sie auf Probleme stoßen oder weitere Unterstützung bezüglich Pairing-Verfahren oder Fehlerbehebung benötigen, wird die Konsultation der offiziellen Dokumentation empfohlen. Insgesamt bietet dieses Setup eine robuste Plattform zur effizienten und sicheren Aufrüstung Ihrer Heim-Audio-Umgebung.

M: QW-35-FL

© Copyright 2026 Manual.ly